


Installation
Preliminaries
In order to run a current version of CONRAD, we presently require all users to run the software from an integrated development environment. A stand-alone version will follow at a later point in time.
In order to setup a CONRAD installation, a computer is required that is able to run ![]() eclipse and a current
eclipse and a current ![]() Java installation (Version > Java 1.7.0). If this is available, download the current source archive and uncompress it into a $WORKSPACE$ folder of your choice. The $WORKSPACE$ folder should only contain the folder CONRAD that was inside the archive.
Java installation (Version > Java 1.7.0). If this is available, download the current source archive and uncompress it into a $WORKSPACE$ folder of your choice. The $WORKSPACE$ folder should only contain the folder CONRAD that was inside the archive.
Workspace Selection
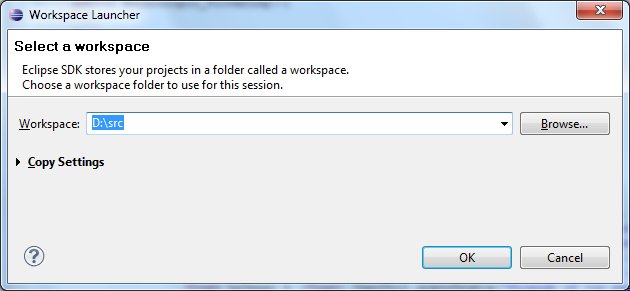 |
Start eclipse. If used for the first time, it will ask for a workspace location as shown in the figure on the right. Please select $WORKSPACE$ in this dialogue. If you already have an eclipse workspace set up, you either need to change the present workspace to $WORKSPACE$ or you need to move the CONRAD folder to your present workspace.
New Workspace
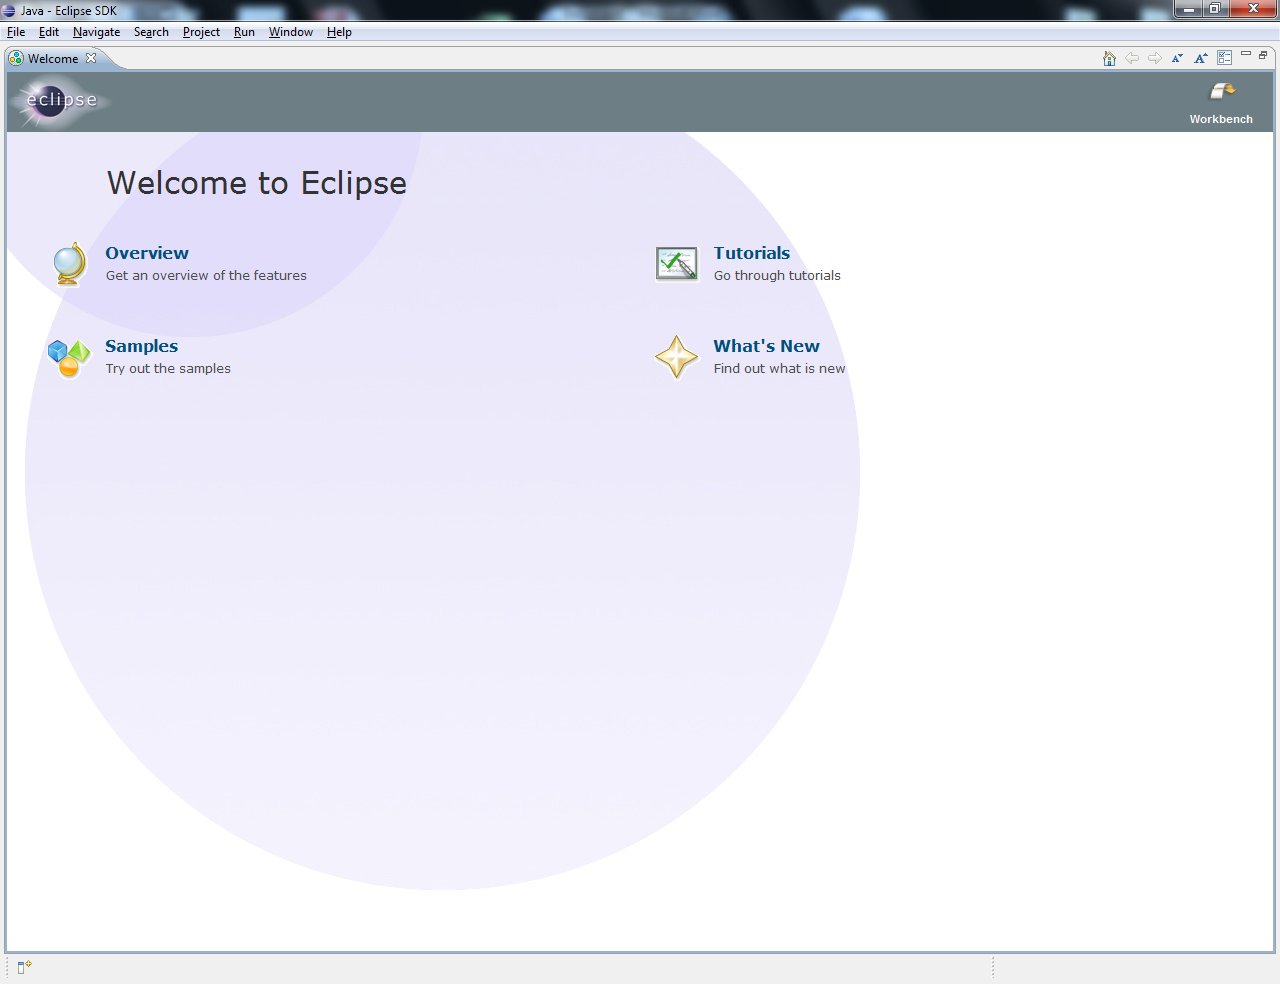 |
In case you switched your workspace to $WORKSPACE$ or in case you have a new installation of eclipse, the screen on the right will appear. Please close the welcome screen.
New Java Project
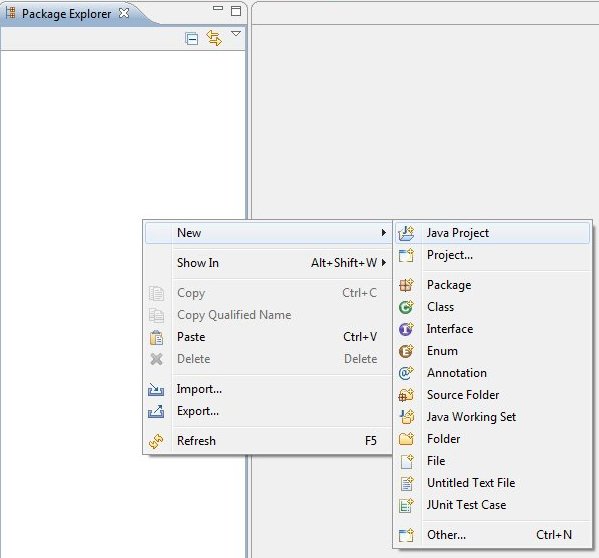 |
Once the normal layout of eclipse was loaded, the CONRAD project needs to be created. In a new workspace, the package explorer will show up empty. Right click the package explorer and create a new Java Project as shown on the right.
Project Import
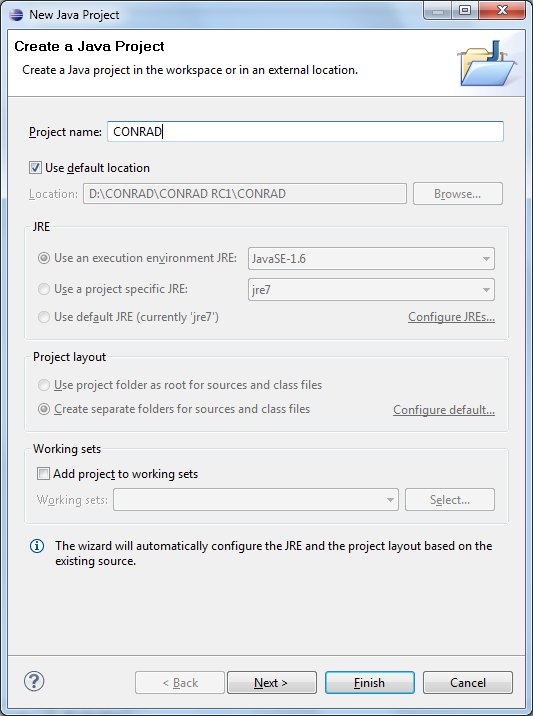 |
A dialogue called “New Java Project” will appear. Enter “CONRAD” as Project name. Next, the message “The wizard will automatically configure the JRE and the project layout based on the existing source.” will appear. Click “Finish” to import the project.
Package Representation
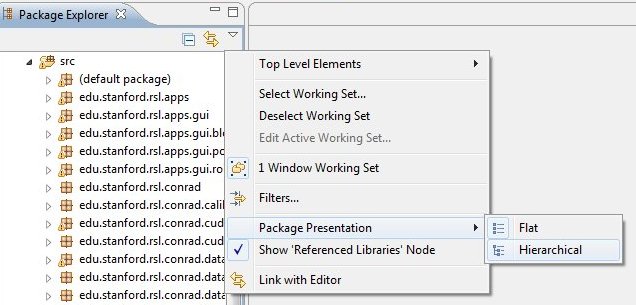 |
As CONRAD contains a lot of classes and packages, it is difficult to gain an overview for a beginner. Thus, we recommend to switch the package representation to “Hierarchical” as shown on the right. Click the small triangle on the top right of the package explorer to do so.
Testing OpenCL Acceleration
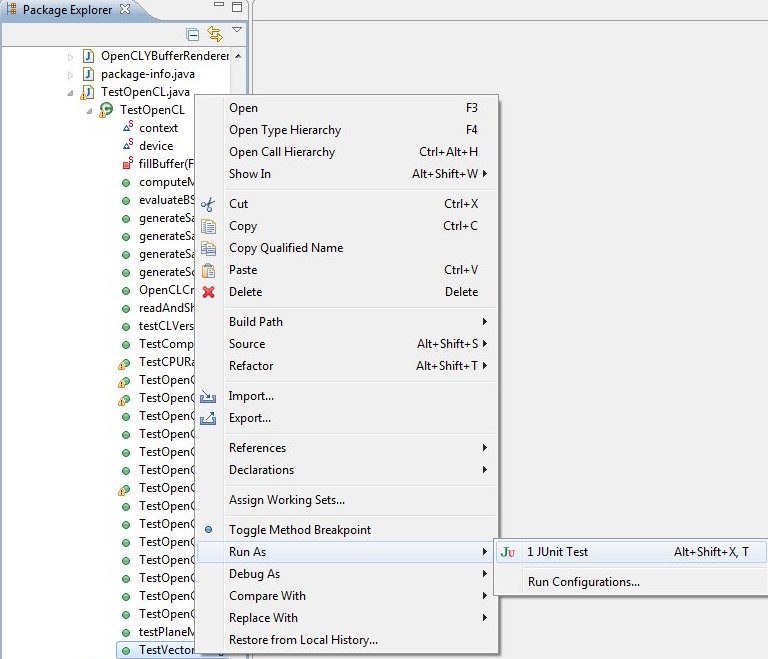 |
Browse to the package “edu.stanford.rsl.conrad.opencl” with the package explorer. Open the list of methods in the TestOpenCL class and select the method “TestVectorAdd”. Now right click the method and select the option “Run As/JUnit Test” as shown on the right. The test should complete successfully, if default configuration file and a valid OpenCL device are selected.
Creation of a Default Config File
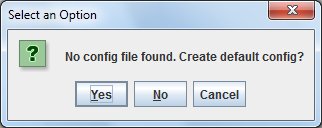 |
CONRAD stores an XML-based configuration file in the user’s home directory to save the current configuration. If the file is not found the system will prompt whether the file should be created or not. If this dialogue appears, please select “Yes”.
OpenCL Device
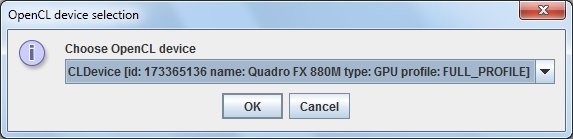 |
CONRAD supports to select the OpenCL device that is intended to be used. If this was not configured, the OpenCL device selection dialogue will appear. Please select the device that you intend to use in the future. The selection can be undone if the respective entry is removed from the configuration file. The option is stored as a CONRAD RegKey.
Running the Main GUI
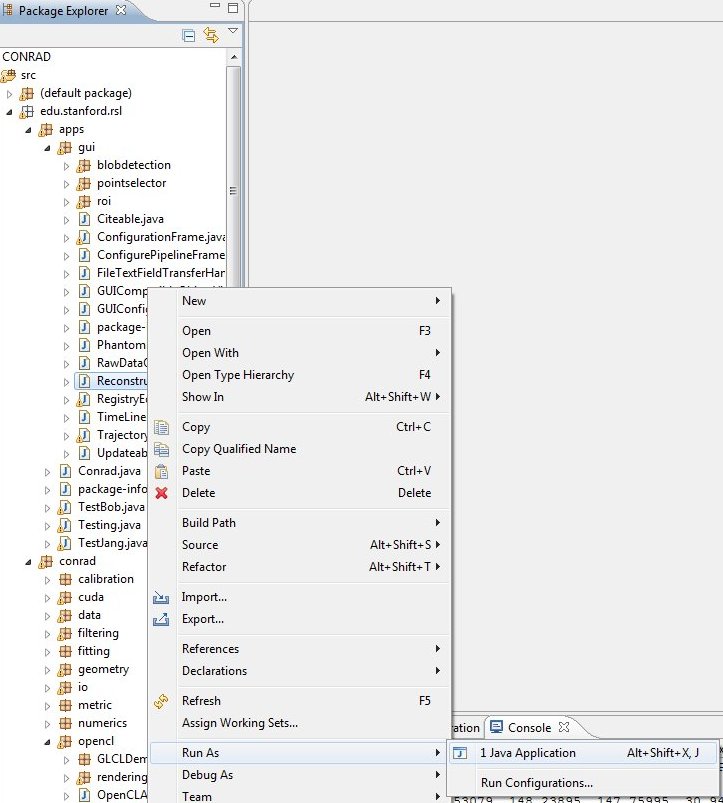 |
The main GUI of CONRAD is called Reconstruction Pipeline frame. It can be executed from the package explorer as shown on the right. Browse to the package “edu.stanford.rsl.apps.gui” and select the ReconstructionPipelineFrame. Right click it and select “Run As/Java Application”.
Main GUI
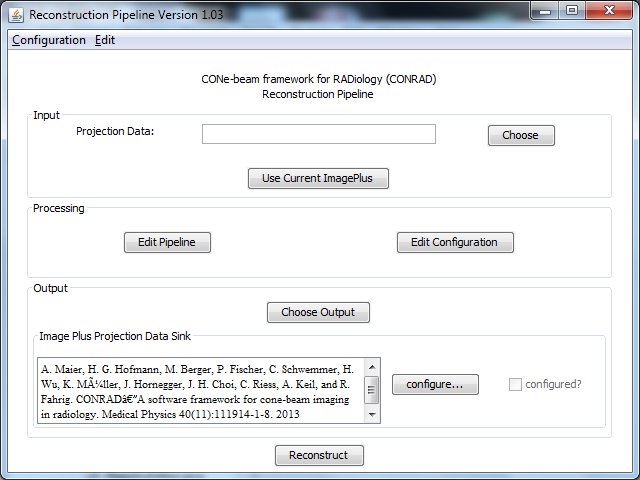 |
If everything was set up correctly, you should now be able to run the main GUI shown on the right. It is the main application to use most of CONRAD’s functionality.